This is the most important part of a stencil. It's the creative step where your art is made. It's my favorite part of the process.
First you need a subject. A word, phrase, object, animal, person, message. This is where it's unique to you and probably the reason you're making a stencil and not buying one.
If you don't have photoshop, you're going to want some free photo editing software. Paint.NET is what I'll be using. GIMP works great as well. If you're a mac user, I'm still looking for a good free utility. GIMP can run on mac, but I've been looking for something native to Mac OS. So far, the one I'm using is less than stellar.
Once you have your photo software running, open up your picture with it and resize it so it is at least 8 inches wide. We're okay with pixellated images, we're going to be editing and smoothing it out anyway. For this example, we're doing a one layer stencil.
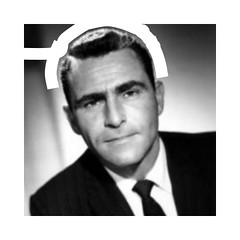
 |
| Original greyscale image |
First turn your photo into black and white. If the subject in your picture has a dark background, it's a good idea to crop some of that out at this stage. You can leave some of it around your subject or not.
 |
| Cropping out dark background |
The next step is to adjust the contrast and brightness settings. The contrast needs to go to 100. We want a straight up black and white image here. The brightness needs to be adjusted to your taste. Play around with it a bit to find the level of detail you want. You may want to adjust different areas of the If you are just doing text, this isn't an issue.
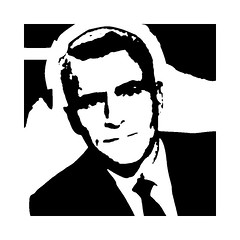 |
| 100% Contrast and variable brightness |
|
Once you have the stencil looking generally how you want it, we have to look at creating bridges and islands. Look at all of the areas where you have white completely surrounded by black. These are the islands. You'll either need to create bridges to them, or black them out. Creating obvious bridges looks bad in my opinion. If you can, try to blend them into the design. The design also should not be touching the edges. You should also take some time here to clean it up and sharpen up any details if you so desire.
 |
| Cleaned up background |
 |
| Sharpened up mouth and removed any islands |
Once you have your complete stencil looking how you want it, turn it into an outline and print it out.
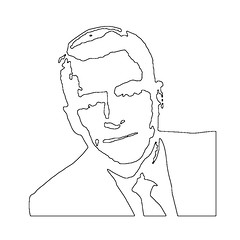 |
| Outline for printing |
No comments:
Post a Comment